 Eyes
Eyes
This
is a tutorial on making an eye using Blender3d version 2.37a. You can
click on any of the images to see the full size screen shot. It only
seems lengthy because I wanted to be as thorough as possible. Please
enjoy!
first
Open up blender.
delete the default cube (x-key).

go to front view(number pad 1).
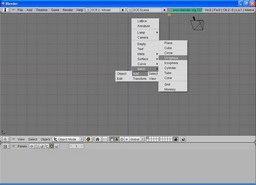
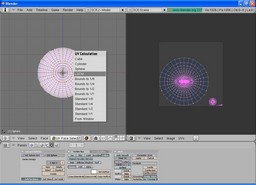
add a uv sphere with 32 segments and 32 rings(space bar > Add > Mesh > UV Sphere).
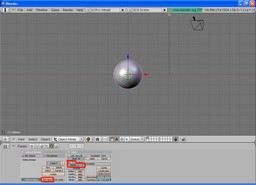
Go into object mode(tab key).
set subsurf to 2 and hit set smooth.
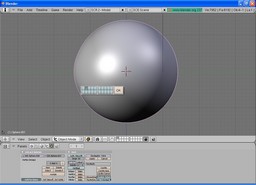
Go into edit mode(tab key) and deselect all vertices(a key).
Zoom in a little so that the sphere fills the screen(number pad + or mouse wheel).

select the middle vertice(right mouse button with cursor over middle vertice).

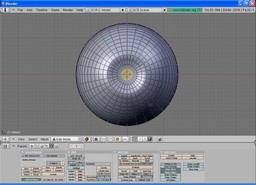
Allow proportional editing(o key) and change to sphere falloff.

grab(g key) and shrink the surrounding circle(mouse wheel) as shown on the map.

Go into side view(number pad 3) and go into object mode(tab key).
Duplicate the mesh(shift+d key) and resize the new mesh to 1.0005 times(s key and type 1.0005).

Go into edit mode(tab key) and press g for grab then y to constrain to y axis and type -.0275.

Now go into object mode(tab key) and move the object to layer 2(m key and type 2).
Select the original mesh in layer 1(1 key) and go into edit mode(tab key) then enter wireframe drawtype(z key).

grab the already selected vertice(g key), constrain it to the y axis(y key), and press .2
Go back into solid drawtype(z key) and vertex loop select(alt+b) the
inner most circle and also select the middle vertice(shift+right mouse
button).
go into side view(number pad 3), turn off proportional editing(o key), and grab(g key) constrained to y-axis(y key) to .5.

Now go to front view and face loop cut(k key and choose loop cut) as the image shows move it to cut at 0%.


resize the already selected vertices(s key) to .5 and then grab(g key) constrain to y-axis(y key) and press .015.

vertex loop select(alt+b) the loop as shown in the picture(make
sure to hold shift to have the already selected loop stay selected.
Now mark a seem(ctrl+e key).

Now we are going to split the screen into two screens. To do this,
place the cursor over the bottom of the 3d window and click the right
mouse button and choose split area.

after you split the 3d view place the cursor over the right screen and pull up the UV image editor(shift+f10).

Now place the cursor over the 3d window and switch to UV face select mode(alt+f key).

Now lcsm unwrap the mesh(u key and lcsm).
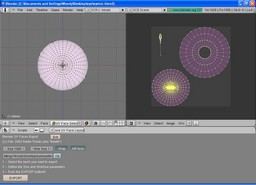
select each peice and size(s key) them and move(g key) them
according to the picture below. Or whatever layout you would prefer.

Now save uv face layout as shown in the image.

Set size of the export to 1000 and set your path to where you want
it to be exported with the name as the last entry(my path is
C:\Documents and Settings\Woody\Desktop\eye\eyetex where eyetex will be
the file name).
Press export :)
Now you should have an image file saved to the directory that you chose that looks like this(without the names).

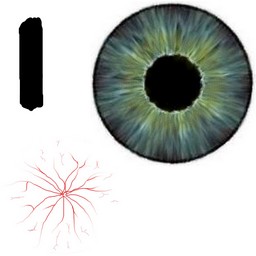
Open it up in your favorite paint program(I use Gimp) and texture the parts as you would like to see them(iris, cornea, pupil).
I use the eye texture from wierdhat's famous pixar eye tut for the iris texture(slightly modified).

Here is the uv image that I painted the layers over with.
Now go back into blender and join the uv and 3d windows by right
clicking with the cursor in between the two and pressing join and make
the top window a 3d window(shift+f5), switch to object mode, and make
the bottom window the buttons window(shift+f7).


Now go into materials(f5) in the buttons window and add a new material and name it eyeball.

Set the material settings the way I have them.

Add a new texture and name it eyecolor.

Map input to UV and map to col.


Now go into the texture buttons(f6) and choose texture type image.

Click on load image and choose the eye texture you made(eyetex.jpg).

Now go back to the materials buttons(f5) and in the 3d window go to
layer two(press 2) and select the object we moved there(right mouse
button to select) and change the materials to what I have.
Make sure and have the z trans tab pressed in the mirror trans tab of the materials buttons.

Now move the object to layer 1(m key and type 1).
Now go to front view(number pad 1) and zoom out a little and place the camera at current view(ctrl+alt+number pad 0).
go to top view(number pad 7) and duplicate the lamp(shift+d).
set the lamps up like this.


Go to scene(f10) and put OSA to 16 and take off raytracing(we don't need it unless we want to get real serious).

Now render the image(f12) and there you go!! It should look something like this.

Hopefully now you will have a quick and easy way to make an eye, it takes me about 5 minutes to make an eye now! :)
Here is a quick test render of the eyes in a head.


